Post-incident hub: Centralize your insights
February 20, 2024

Once an incident is closed, it’s common for responders to enter the post-incident flow. This helps to guide responders in learning about what went wrong, and to improve their resiliency for similar incidents in the future.
For responders who are involved in multiple incidents, it can be challenging & time-consuming to keep on top of these post-incident tasks, with many tasks remaining outstanding way beyond the resolution of an incident.
And that’s exactly why we've created the Post-incident hub.
In the past, if a responder wanted to find post-incident tasks that they’ve been assigned to, they needed to navigate through each individual incident’s post-incident flow to review any outstanding tasks.
With the Post-incident hub, we’ve consolidated all your post-incident tasks in one intuitive interface, making that workflow more streamlined than ever. Here’s what’s new:
Consolidated overview
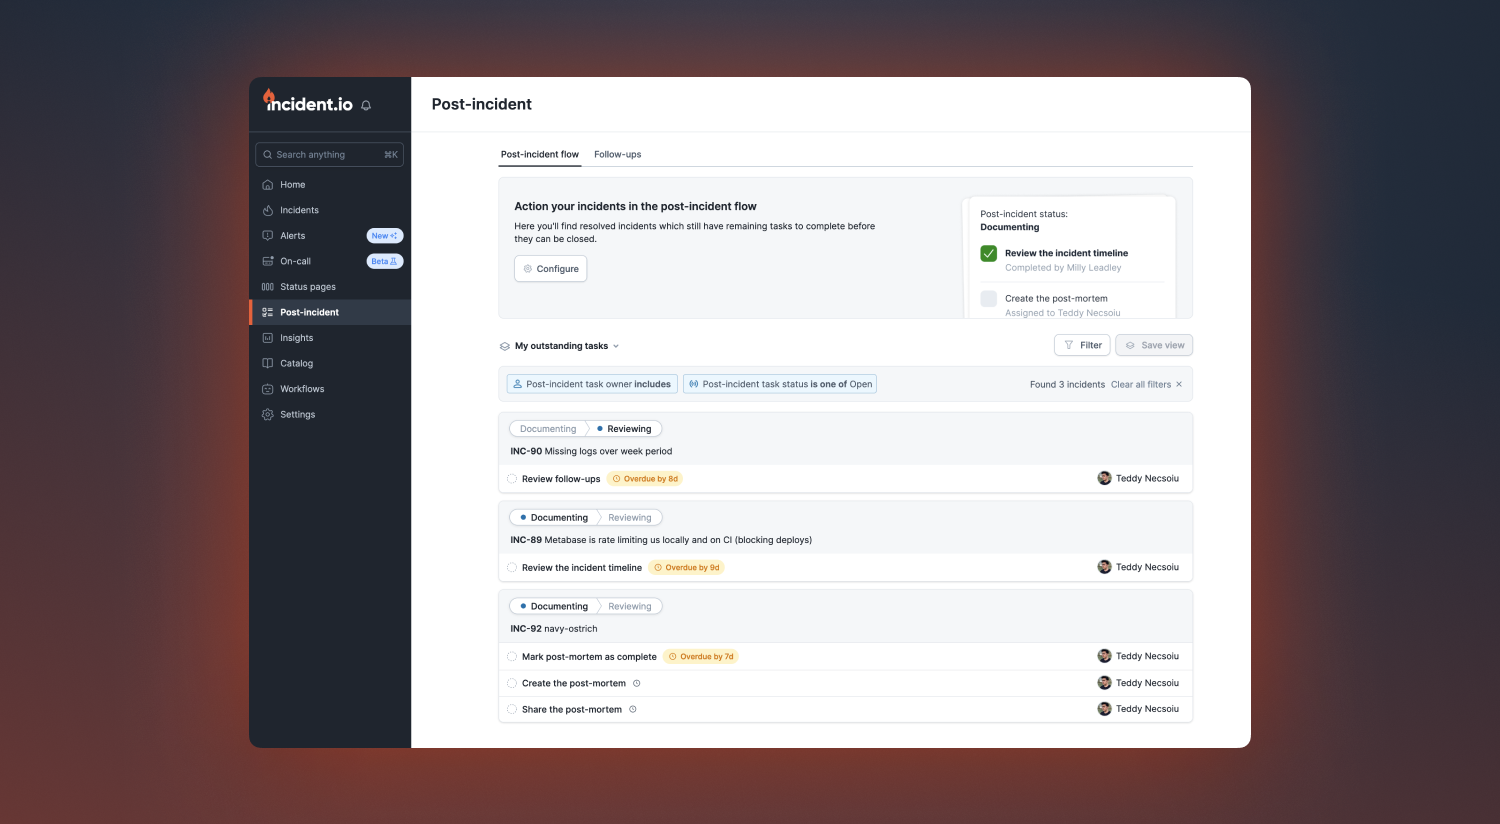
We've added a new overview page aggregating all post-incident tasks across all incidents. This page is pre-filtered to show tasks assigned to you, making it easier to manage your workload.
Advanced filtering
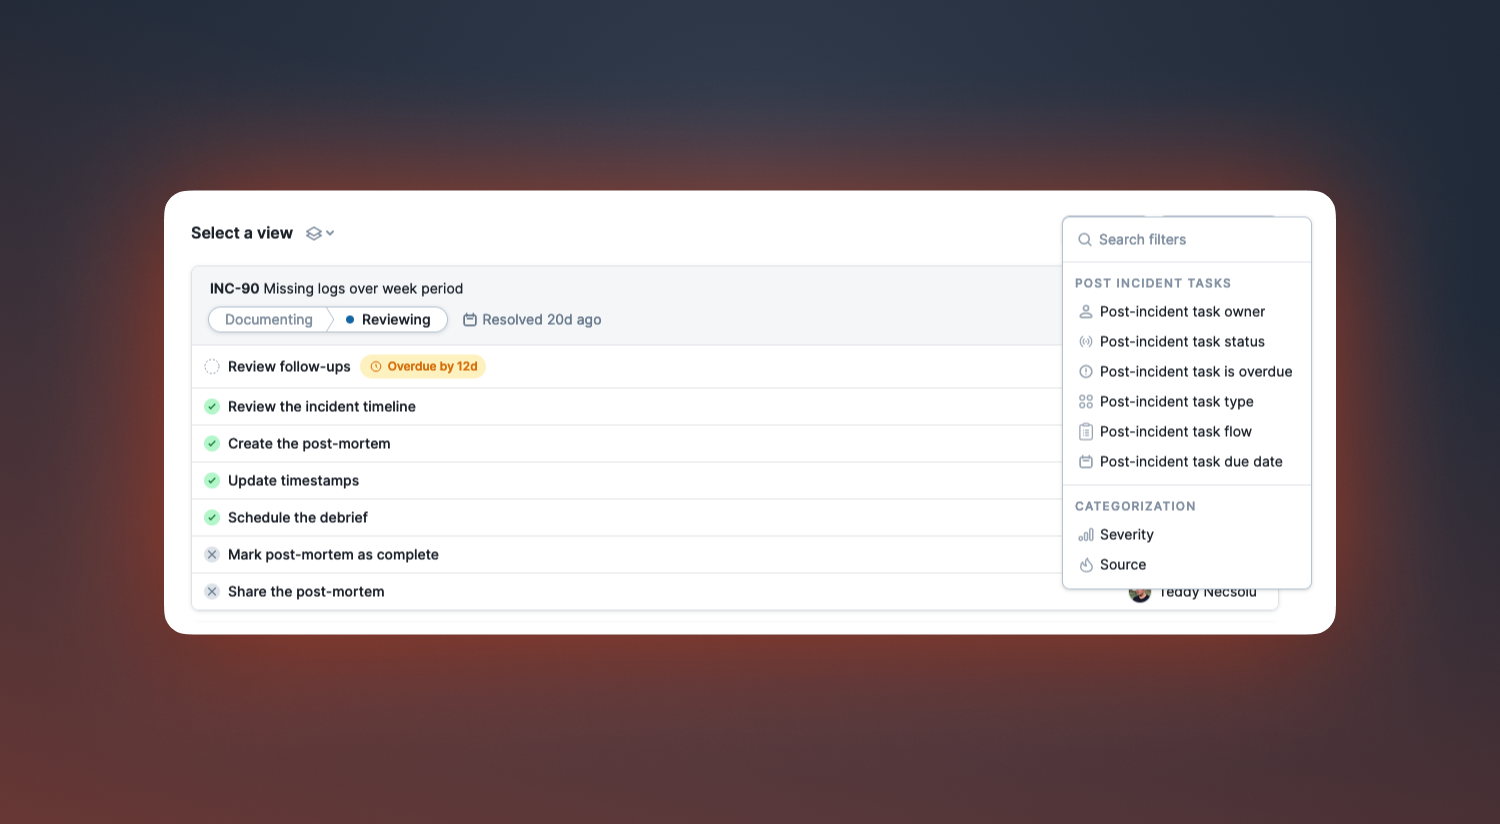
To help you navigate to relevant post-incident tasks more efficiently, we've added several new filters. Now, you can filter tasks by owner, status, type, flow, and due date.
Preset views
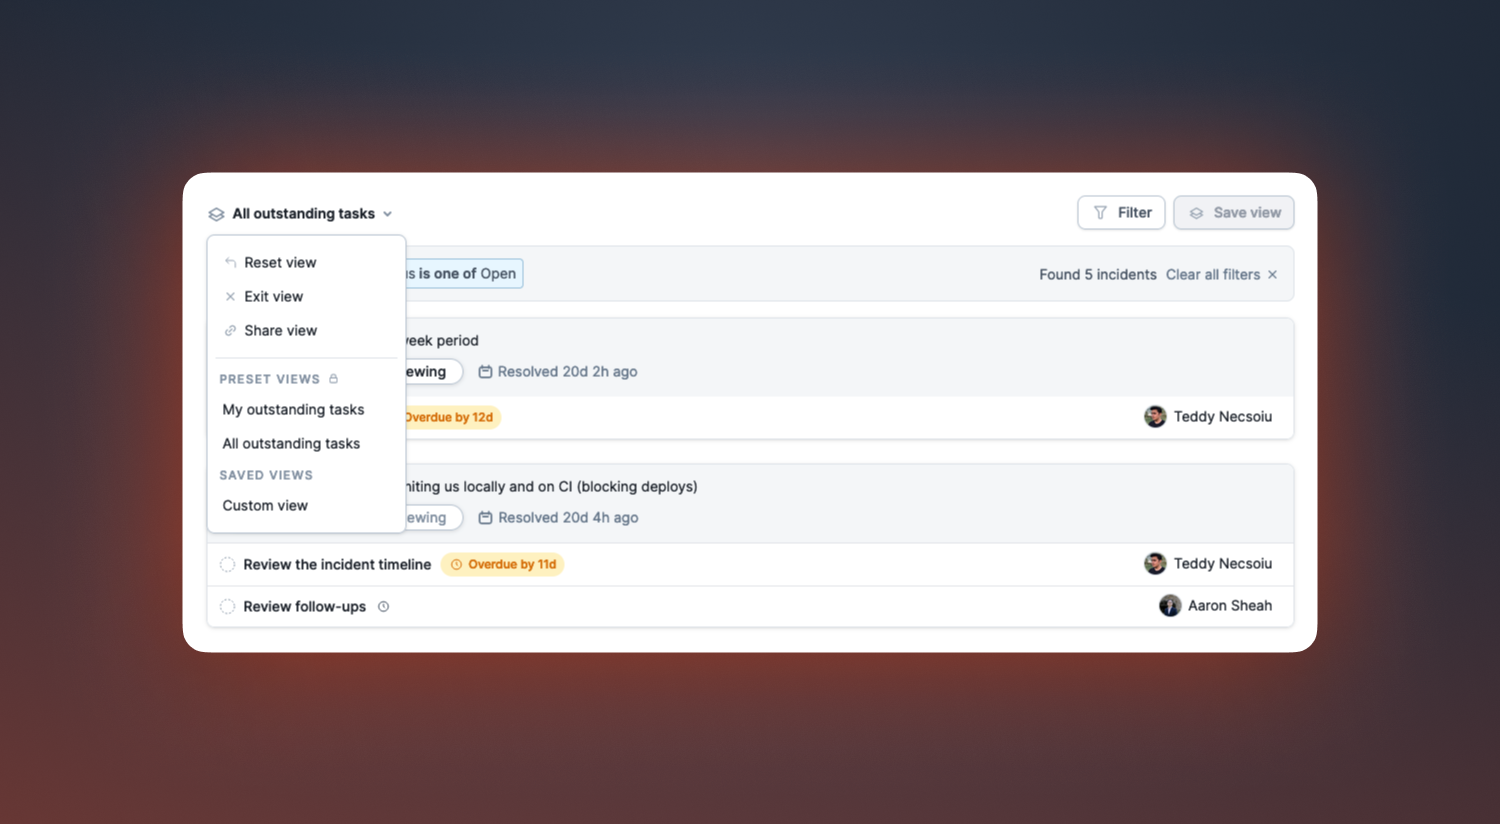
We’ve also added new preset views that will filter for tasks assigned to you & outstanding.
Quick actions
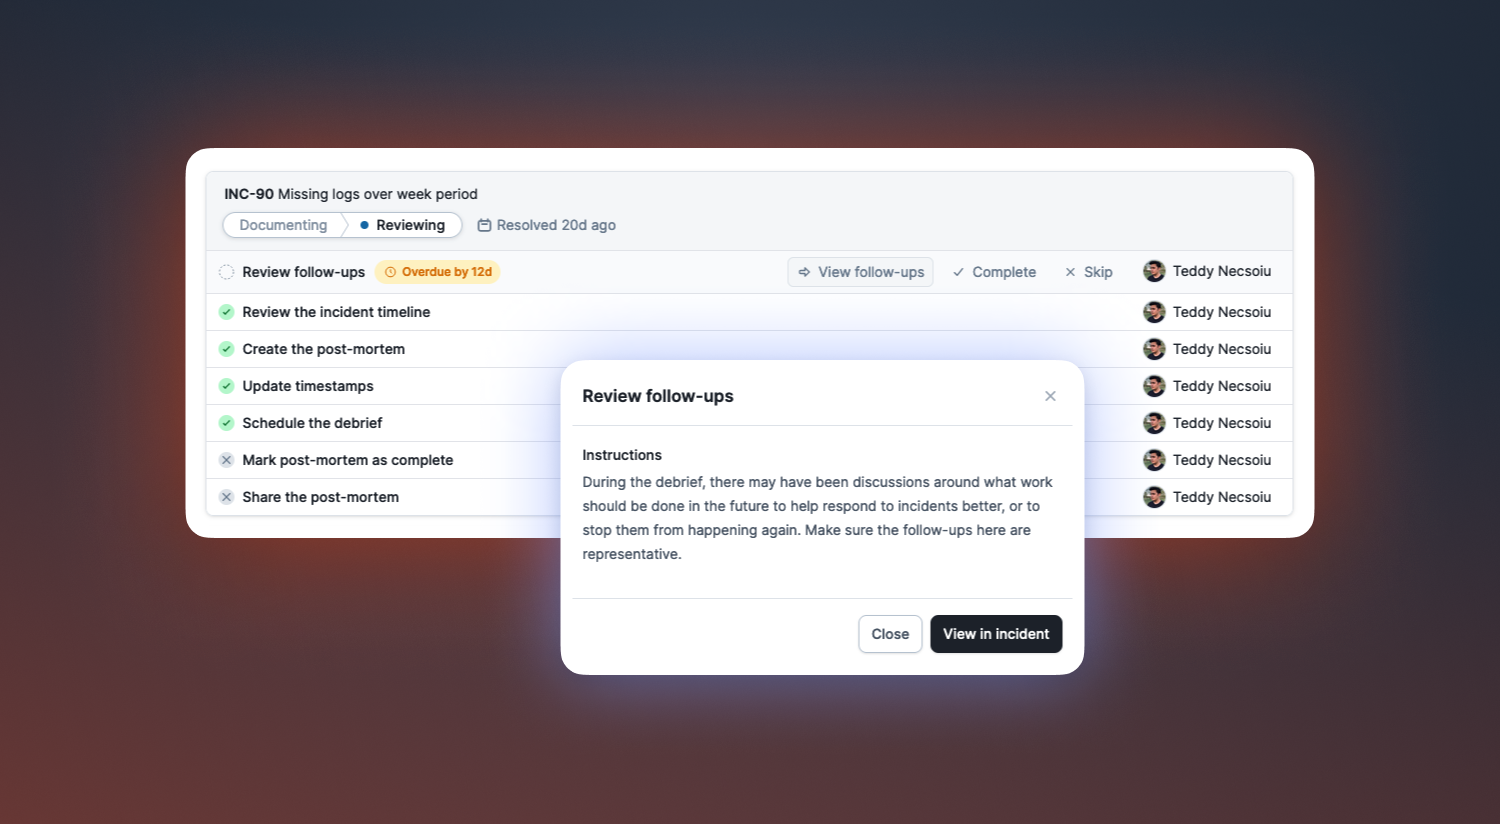
It’s possible to complete tasks directly from the Post-incident hub, saving you lots of clicks. When hovering over a task, we show you the list of actions you can perform on that task.
Due dates
We've introduced due dates to post-incident tasks, allowing you to specify when tasks need to be completed by. Due dates are visible in Slack, when entering a post-incident flow, on the incidents details page and in the new Post-incident hub.
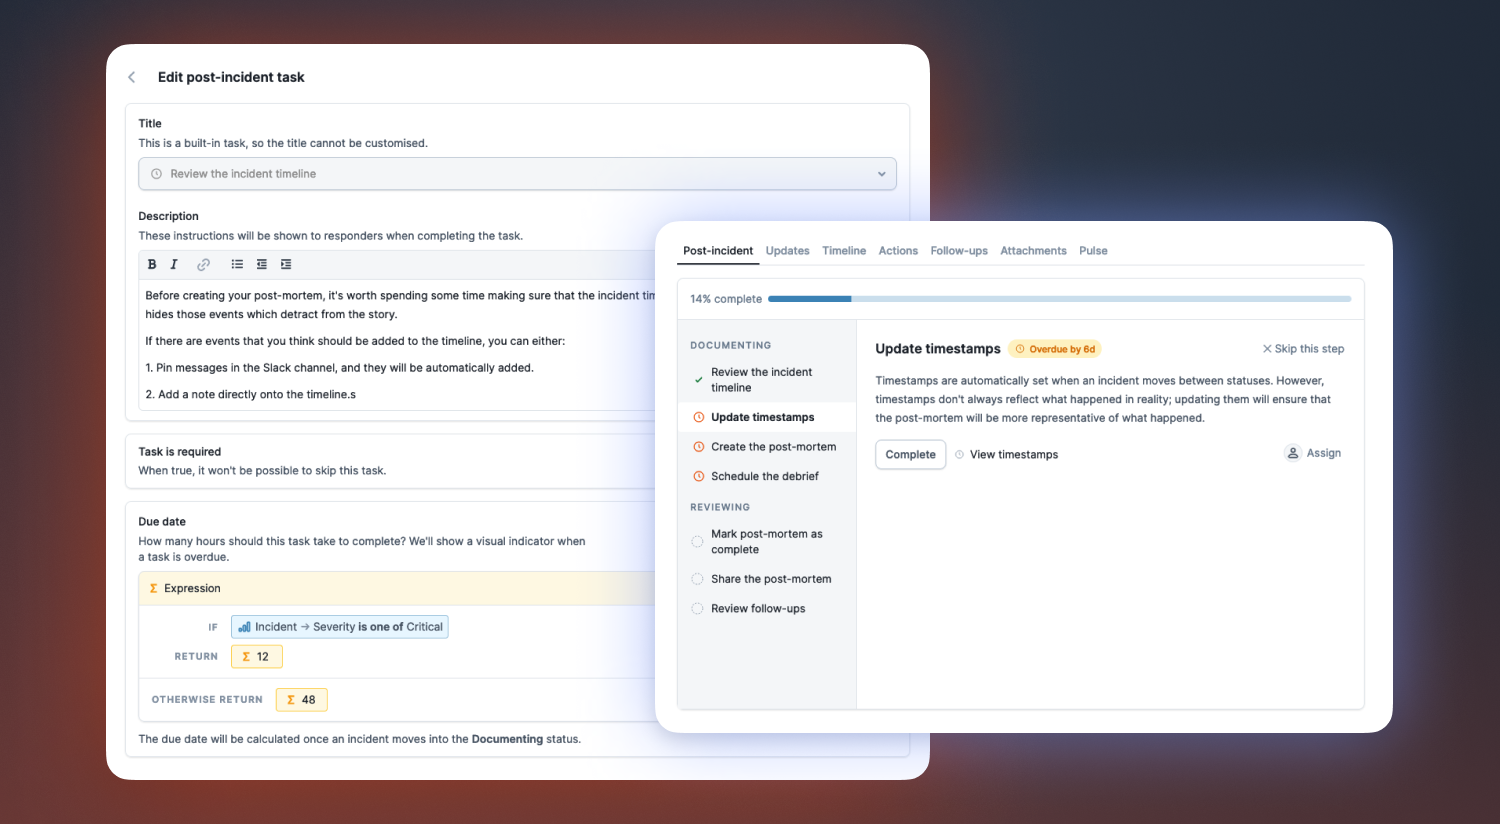
The goal of the Post-incident hub is to get incident responders to an actionable list of tasks as efficiently as possible, enabling them to quickly complete tasks, all without navigating between many parts of our application. In short, it’s a post-incident “to-do” list.
Pre-filling "declare incident" custom fields using URL parameters
When declaring an incident, you can now pre-fill the custom fields via the URL parameter. This helps in cases where incidents are being declared from another location (e.g. an internal service that you’re running), and information is already known about the incident (e.g. affected team, impacted service, and so on).
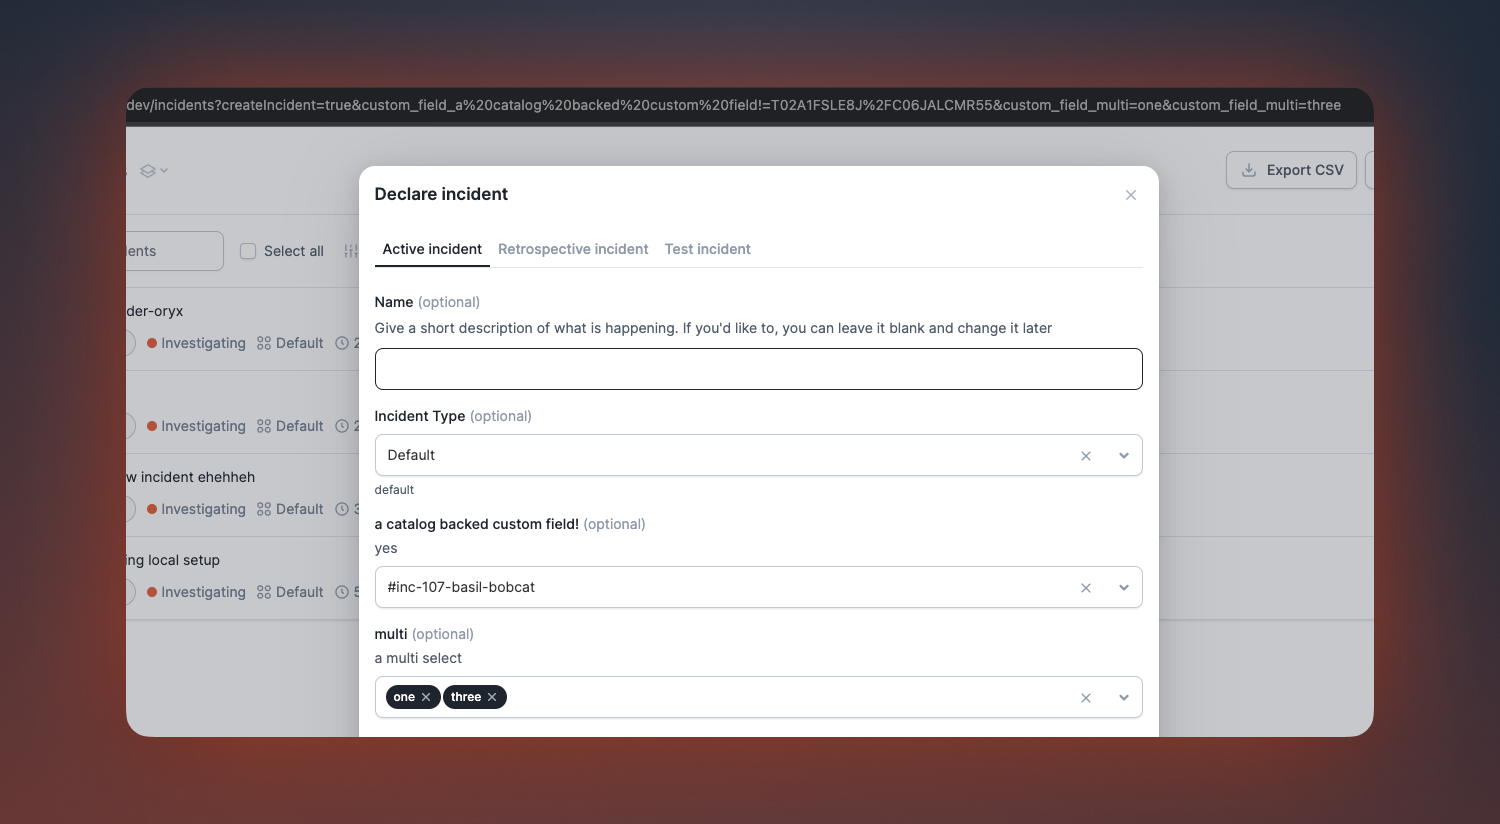
Check out the help centre article for more info on pre-filling "declare incident" fields.
Using variables in Slack bookmark URLs
You can now use variables to craft a URL specific to an incident. This feature is great when building links to internal pages specific to the incident or parameters for pre-filling forms.

🚀 What else we’ve shipped
New
- You can now use the power of expressions in incident forms
Improvements
- Added additional validation when updating an incident's state
- Improved the timezone behaviour for status pages
- Improved our handling around embedded images
- Amended copy for AI Assistant
- Rendering timeline items that link to Slack is now quicker
- Remove callouts within the product for form configuration having moved
- Improved error handling when auto-exporting follow-ups
- Improved alerting around our integrations
- Improved error handling with Zendesk
Bug fixes
- Fixed status page redirects when you have renamed your default page
- Fixed filtering incidents by having a debrief
- Fixed retry posting comments to a Zendesk ticket
- Fixed being able to mark a post-mortem as complete whilst it’s still being created
- Fixed Slack double notification
- Fixed a race condition when entering the post incident flow, which showed a confusing message about there being no tasks configured
- Ensure incident templates correctly displayed their name
- Fixed forms from incorrectly resetting when editing a follow-up template
- Fixed an issue redirecting to internal status pages
- Fixed export of different timestamp formats to Jira
- Fixed an issue that prevented admins from deleting custom fields under some circumstances
So good, you’ll break things on purpose
Ready for modern incident management? Book a call with one of our experts today.
We’d love to talk to you about
- All-in-one incident management
- Our unmatched speed of deployment
- Why we’re loved by users and easily adopted
- How we work for the whole organization


