Customising your Incident Lifecycle with Custom Statuses
September 20, 2022

We’re introducing Custom Statuses and Incident Timestamps 🎉
We’re continuingly expanding our product to allow even more customisation, so that you can configure us to perfectly suit you and your organization.
Custom Statuses

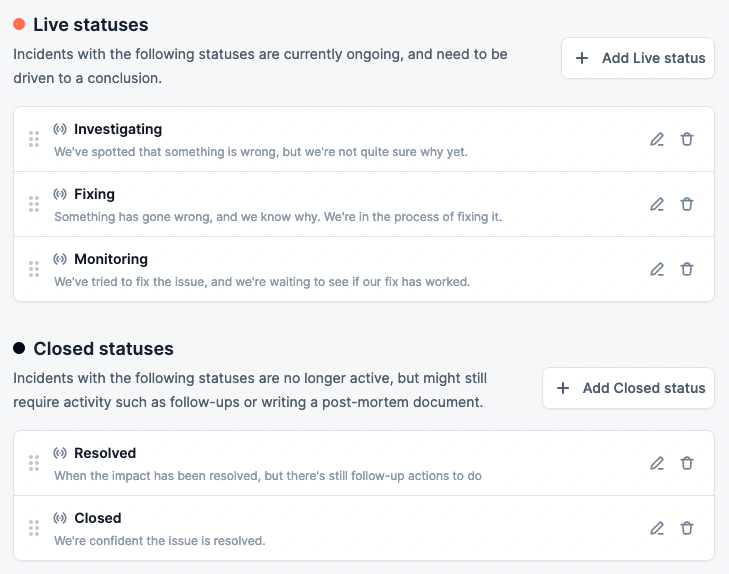
You can now create your own Custom Statuses, to fit your incident process.
A good example of an additional status could be "Resolved". This would be a status before the final "Closed" status, to be used when the incident has been resolved, but there’s still parts of your post-incident process to do, such as running a post-mortem, or exporting follow-up items to an issue tracker.
They are split into two categories: live statuses and closed statuses.
- Live statuses are when the incident is actively being worked on
- Closed statuses are when the incident response is over, and it's time to learn from the incident and implement follow-ups
Incident Timestamps
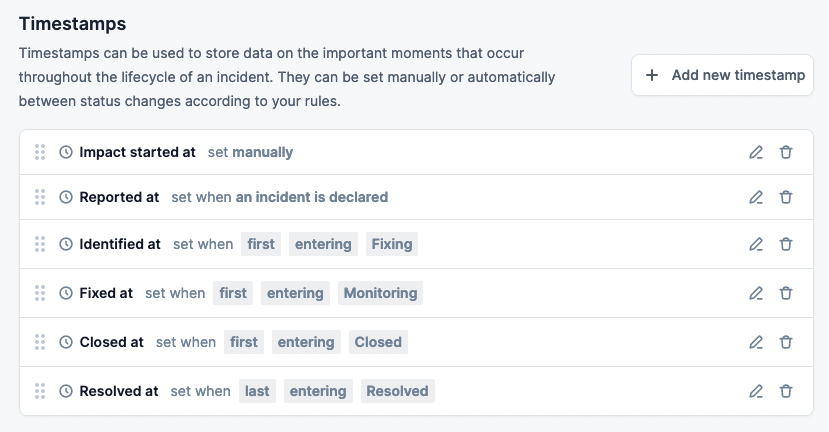
In addition to the timestamps that are automatically set, you can now create your own Incident Timestamps to store key information about your incidents.

We’ve added “Impact started at” as a default timestamp. As the impact of your incidents can often start before the incident is declared, you can then manually input this information later on. Doing so allows you to have a better understanding of your incidents.
You can add any timestamps that suit you, and have them automatically set based on conditions, or have them be manually inputted.
You can check all of this out, in the incident.io dashboard in Settings -> Lifecycle
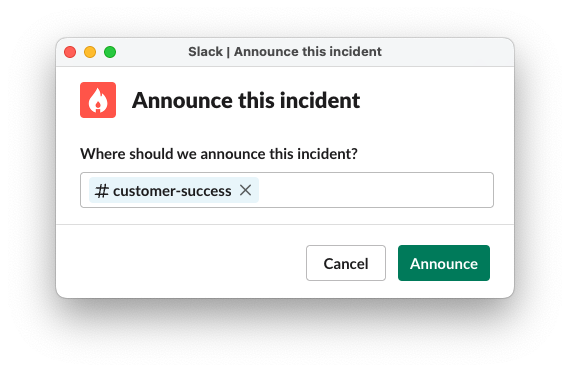
New /incident announce command

This allows you to easily announce an incident in any Slack channel you wish.
This can be very useful if there’s an incident that impacts a particular team, or if there’s a particularly high impact incident that you wish to announce more widely.
Just type /incident announce in any incident Slack channel.
Custom Fields with External Options
We’re making Custom Fields even more powerful 💪
The available options of a Custom Field can now be synced with external sources, such as PagerDuty.
For example, you could use a Custom Field to track which PagerDuty services were affected. And the available options will always be kept up-to-date. You can also combine this with workflows, so that (for example) PagerDuty escalates to the specified team.
What else we shipped
Improvements
- Templated Text Editor now includes icons next to the available variables
✨
- You can now react with ⏩ to easily create a follow-up from a Slack message
- ☎️ PagerDuty escalations via Workflows, now include a link to the PagerDuty incident
- ⚡️ We've made some improvements to speed up the incident list API
Bug fixes
- Bugfix for tutorial incidents with private incidents as default
- Bugfix for invalid trial end dates
So good, you’ll break things on purpose
Ready for modern incident management? Book a call with one of our experts today.

We’d love to talk to you about
- All-in-one incident management
- Our unmatched speed of deployment
- Why we’re loved by users and easily adopted
- How we work for the whole organization


