Building On-call: Building a multi-platform on-call mobile app
July 15, 2024 — 17 min read

A significant part of being on-call is the ability to respond to pages and handle escalations on the go. In the early stages of developing incident.io On-call, we considered whether a Minimum Viable Product (MVP) could rely solely on SMS and phone calls. However, we quickly realized that a fully featured mobile app was going to be essential to the on-call experience.
This led us to the question: how should we build this mobile app?
Choosing a technology
Initially, we drew from prior experience and spoke to peers elsewhere about their experiences building and maintaining mobile apps. The main question was what technology should we be using?
Native iOS and Android
If you ask Apple or Google, a native app built in Swift or Kotlin is the way to go (ignoring Google’s Flutter for a moment). With a native app, you’ll work directly with each company’s SDKs, making it the easiest option to build OS-specific features and adhere to UI and UX standards.
However, you’re writing code specifically for that platform and thus will be building and maintaining two distinctly separate apps.
Kotlin Multiplatform
Aiming to bridge the gap around writing two separate apps is Kotlin Multiplatform. This is a technology that enables you to write your code once in Kotlin and run it on both iOS and Android. Often, this is done such that you write shared logic in Kotlin, but write your UI elements for each platform separately in their own styles.
This is a relatively new technology, having been declared “stable and production ready” in November 2023, which happened to be right around when we were trying to choose a technology ourselves.
Flutter
Flutter is another option from Google for building a mobile app. With it, you write your code in Dart, which gets rendered using Flutter’s own rendering engine on both iOS and Android.
As you’re running the same rendering engine on both platforms, Flutter makes it easy to have a consistent look and feel for your app across platforms, but this can be at the cost of your app feeling a little uncanny-valley to the OS its running on.
React Native
React Native is the final option we considered. With it, you write React code using Javascript. The UI that you render uses real native UI components under the hood, so the argument is that you can build real native apps across both platforms using Javascript.
However, not everything you do in a Native app is readily available in React Native, with some core things like navigation being left to you as a user to work out.
To help guide our decision, we spoke to experts in each technology, but we brought our own set of preferences too. These included:
- We wanted an app that felt great to use. We believe this is possible with any mobile technology, but some might require more effort than others.
- We were not keen on maintaining two separate apps. If possible, we wanted to write code once and have it run on both iOS and Android.
- We wanted everyone on our team to be able to contribute to our app. Regardless of the technology we choose, there will likely be some learning curve, but we wanted to keep it as manageable as possible.
Ultimately, we landed on React Native as our main candidate for a technology. We’d heard of Expo, described as the “Vercel of React Native”, and decided to prove out our plans with an upcoming hackathon.
Initial exploration
We took advantage of a planned company hackathon to spike out using React Native and Expo. We assembled a small team of two engineers and a designer, and set to work on trialling the developer experience and overall UX. The project we built leaned into Expo as much as possible. We began with Expo Go and their project template.
Expo
Expo Go is an app that anyone can download from the App/Play Store and acts as a mini execution environment for your Javascript code. It comes with a bunch of useful native dependencies built in, such as Expo Router and Reanimated.
What’s great with Expo Go is that you can get developing on an app without having to set up your machine with all the tools you normally need for app development.
Rather than installing Xcode, Android Studio, Java, Cocoapods, etc., you instead just download Expo Go to your phone, run yarn start to run a Javascript server and scan a QR code.
Instantly you have your app running on a physical device with legitimately good hot reloading. In our experience, you could go from nothing to making code changes, faster than it can take to download Xcode.
At no point with an Expo Go set up do you need to compile and run any native code yourself. To demonstrate that, here’s a simplified version of the structure of our mobile app repository (no build.gradle or IncidentIO.xcworkspace to be seen!).
├── README.md
├── app
│   ├── ... our app structure is defined here
├── app.config.ts
├── assets
├── babel.config.js
├── components
│   ├── ... our components are defined here
├── eas.json
├── index.js
├── metro.config.js
├── package.json
├── tailwind.config.js
└── tsconfig.json
Replicating our web codebase
Our web dashboard is built using tools like React, React Router, SWR and Tailwind. We wanted to explore how similar we could make our React Native code, as to minimise context switching across the two surfaces.
In our hackathon, we took our bare Expo template project and started adding some dependencies to make things feel a little more like home:
- We opted the generated mobile app into our Yarn Workspace. This meant we had an autogenerated, type-safe API client ready for usage. We also installed a Vercel library we use elsewhere called swr, which we use alongside our autogenerated API client to make fetching data really easy. For example, I can get a list of schedules as simply as:
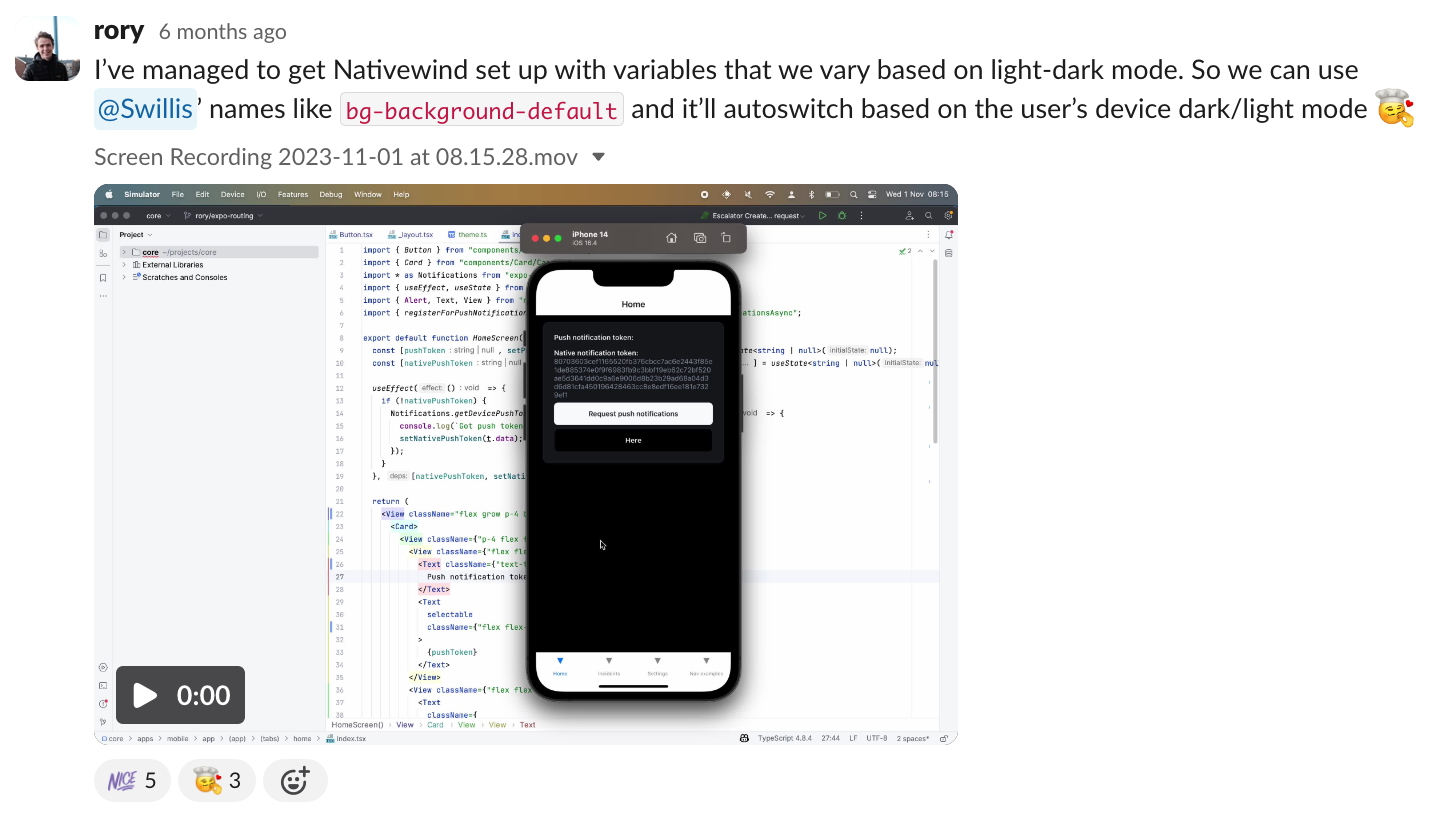
const { data: schedulesResp } = useAPI("schedulesList")- We added Nativewind, a React Native port of Tailwind CSS, which gave us a familiar environment for styling components. On top of this, we made our tailwind.config.js use semantic colours via CSS variables, meaning that we support light and dark mode out of the box.
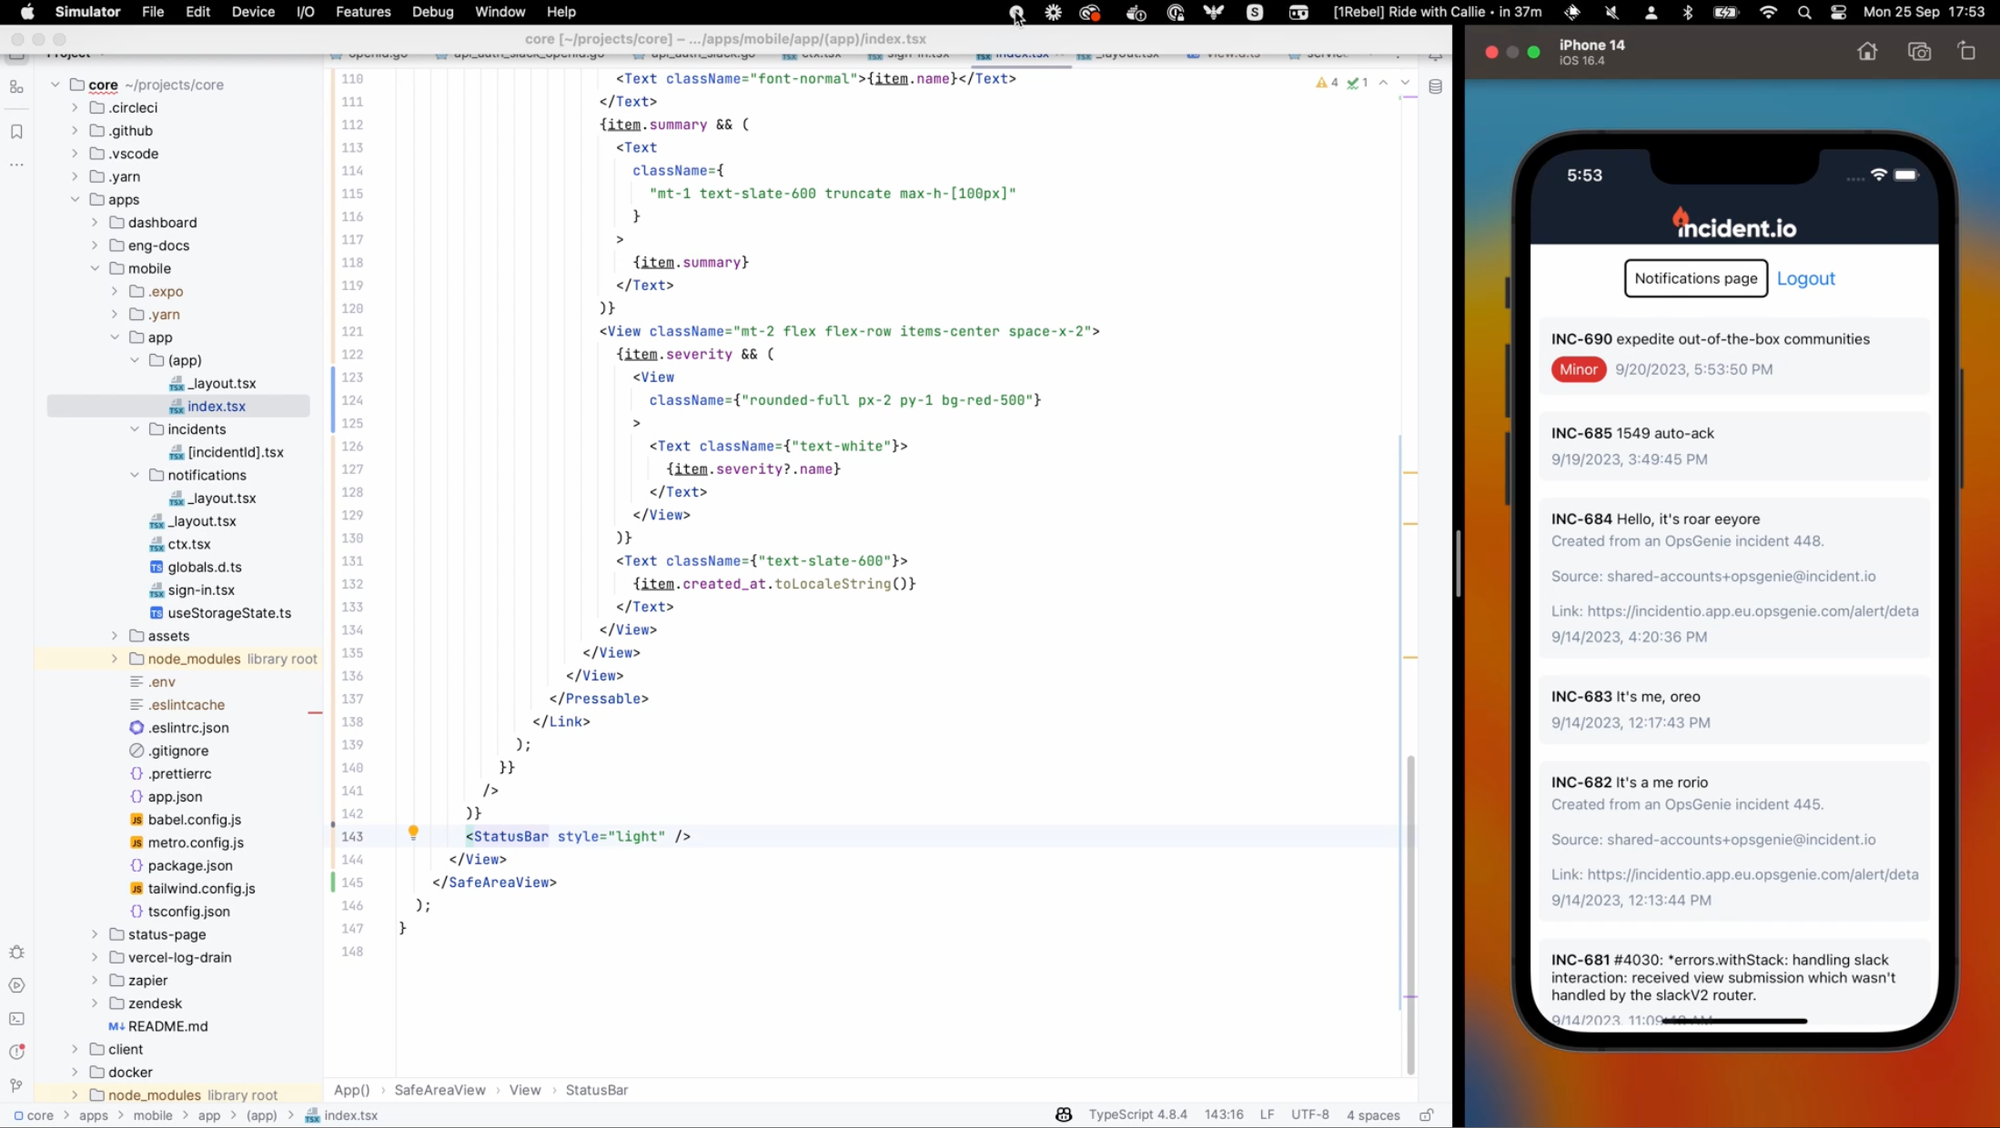
- We also installed Expo Router, which gave us directory structure based routing, like we have on our Next.js application that powers our Status Pages product. In doing this, we get out of the box support for things like deeplinking from push notifications, and a handy ‘sitemap’ available from Expo’s dev menu.
Transitioning to a development build
A key part of the on-call app is receiving push notifications. This isn’t something you can do with Expo Go, as doing so relies on you generating a push certificate in your own Apple Developer account, which is tied to your app’s bundle ID, rather than Expo’s generic wrapper app.
Despite this, we still wanted engineers to be able to contribute to the mobile app without needing to set up a native app environment and compile it themselves locally.
Fortunately, Expo have a solution built with this in mind. You can utilise what they call a “managed” workflow and their “prebuild” solution to ephemerally generate ios and android projects specifically for your project. Rather than maintaining an Xcode project or a build.gradle, you instead have an app.config.json file where you can define all the different config about your app. This includes things like:
- The name of your app
- The bundle ID of your app
- The app icons you want your app to use
- Any
Info.plistorAndroidManifest.xmlattributes that you’d like to set
To get push notifications working, we started defining our config file and then utilised Expo’s Application Services (CI tooling) to build the native components of our app on their side. Once that’s done, we get a little QR code that we can scan to install our own little wrapper app. It looks a lot like Expo Go, but has our own packages installed and is configured for our push certificates.
Result of the hackathon
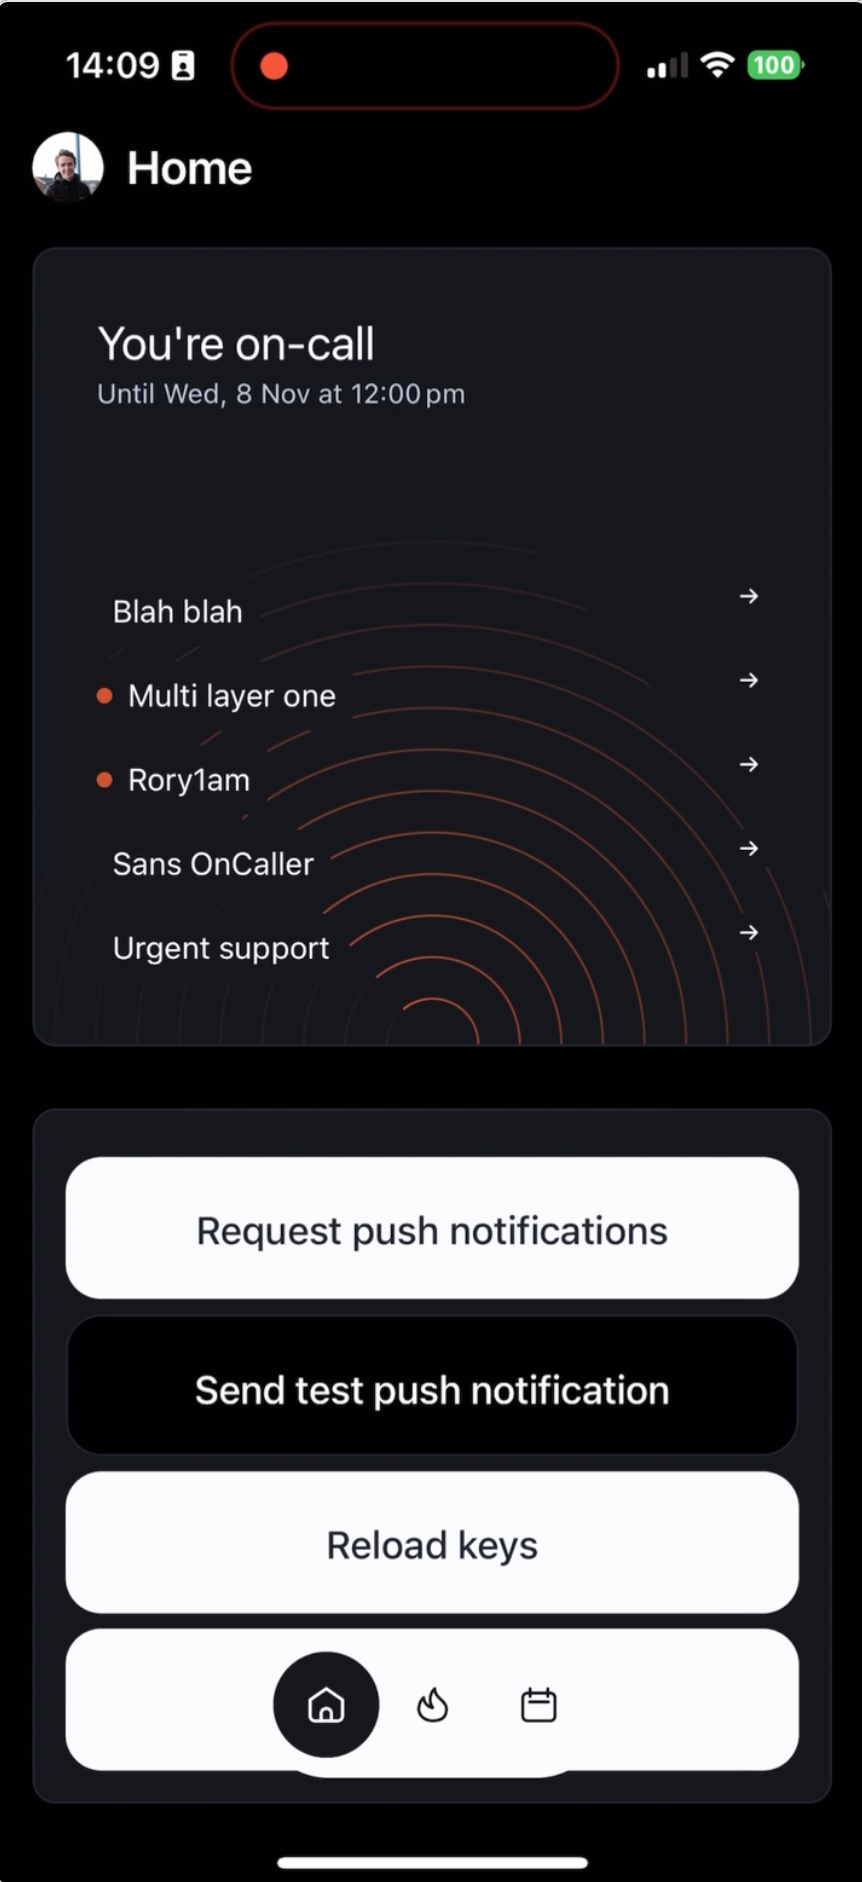
Once we’d got our dependencies set up and running, iterating on React Native was a breeze. With two of us working for two days, we built a basic app that could login, show if you’re on-call, and send you push notifications when you were paged.
In reviewing our goals for a mobile app technology, we really thought React Native ticked a lot of boxes:
- We built an app that felt native. We really cared that the native gestures that people are used to, work just like they’re used to on our app. There’re no uncanny-valley gestures that almost feel right but something is just off.
- We also built both an Android and iOS app from a single codebase. There were quirks from time to time that we had to solve for, where something would be working on one device, then you’d test it on another and realise performance was terrible, but nothing too egregious.
- Finally, we created a codebase that could easily be mistaken for our web codebase. The code is really quite similar. There’s perhaps even a future where we start sharing some code and components between the two - we’ve already got this happening for our generated API package, it might not be crazy to apply it to building our UI too.
Productionizing
Building for a hackathon is one thing, but making something publicly available is a whole other kettle of fish, as I’m sure some of you are well aware!
Following our hackathon, we returned to developing the rest of our On-call product: building out support for schedules, escalation paths and the executor that runs the show when you are page. Just over a month later, we had a basic end-to-end on-call product, and we felt it warranted a real mobile app in order for us to dogfood it properly.
Rather than start from scratch, we took the hackathon project and stripped it back to a bare minimum. This avoided us redoing work to get dependencies and whatnot in place, but cleared the decks so that we weren’t tied to partly-functional hackathon implementations.
The core features we focussed on initially were logging in, setting up notifications and acknowledging pages. Iterating on these was really quite a smooth experience and we made quick work of them. The areas we had less success in were more related to CI/CD tooling and also working with some mobile APIs to work with your system volume and mute switches.
Build tooling
For our Go backend and React web dashboard, we use CircleCI as our CI/CD build tool of choice. When it came to mobile however, Expo offer a build tool that we wanted to make use of. Given building React Native apps is their area of expertise, we wanted to offload that work to them. This gave us benefits like:
- Not having to deal with certificate signing, distribution certificates and other “rare to deal with, but real time sinks when you need to” things for mobile development. Expo manage most of these for you.
- Easy management of build environments. Had we used CircleCI, we’d need to set up separate Android and iOS build images and manually write some of the build pipelines that you get for free with Expo.
- Things like QR codes that you can scan to download builds are another thing that you get out of the box on Expo.
As we mentioned above though, this wasn’t all smooth sailing. When I first tried building with Expo’s build services, everything went fairly smoothly. But later, as I adopted our autogenerated API client, by opting the mobile app into our Yarn workspace, things started to go awry. I started to get build errors when pushing to Expo that I couldn’t reproduce at all locally.
Speaking of locally, Expo don’t really give you the tools to replicate their build environments locally. It’s up to you to match the version of Xcode, Ruby, Cocoapods, etc. that they’re using. Most people working on our React Native app will never need to think about this sort of stuff, but when you are working on it, it can feel a bit like you’re working at the operating table wearing a thick pair of gloves - everything is a little abstracted and distant.
To fix our Yarn workspace issues, we utilised some CLI tools that Expo provide to try and run CI builds locally. What we found was that the source code directory being uploaded to Expo contained some files we definitely didn’t need to upload (such as our Go source code), and was missing some files we definitely did need to build a valid Javascript bundle. By creating an easignore file, we could specify exactly which files were needed.
Platform specific APIs
For most things you need to do in React Native, you can often find a package where someone’s implemented the native <> Javascript wrapper that you need. Expo themselves make and maintain a number of these packages, and there are thousands of other packages for just about everything you can think of.
For our app, we almost got away without having to write any Swift or Kotlin ourselves, until we got to a critical feature of on-call — having your phone ring (loudly) when you are paged.
On iOS, making your phone ring, even if your phone is in do-not-disturb or in silent, is an operating system supported thing. To do so, you simply request permission to send “critical” alerts, and then when sending push notifications to APNS from your backend, you set a boolean flag on the notification payload that says { "critical": true }.
For Android however, there’s no built-in way to achieve such a thing. Given this is quite a niche use-case, there were also no React Native packages we could install that would do such a thing. This meant we had to roll up our sleeves and get writing some Kotlin.
If you’re a mobile or React Native developer, that might have you thinking that we had to concede our development set up where you only needed to run the Javascript, and you never need to build any native code. But, there’s an Expo feature called “modules” made for exactly this use case. It allows you to define bits of native code as ‘plugins’ for your ephemerally generated projects. This means that when we build our app on Expo’s side, they’ll generate an Android project from our config file, and then apply a plugin we’ve written that contains all of our native Kotlin code and install it as a Gradle dependency on the generated project.
This is a fairly new feature to Expo and we found the docs a little confusing, it required a reasonable bit of trial an error. We also weren’t great Kotlin engineers. I personally had some experience writing Kotlin itself, but much of the process involved working out things like Gradle dependencies, which I’d done much less of.
Nonetheless, the feature worked just as we’d hoped and we managed to build our own tiny Kotlin package that has responsibility for making your Android phone ring, even if it’s on silent.
Conclusion
At the beginning of March this year we shipped our On-call with a mobile app. We actually wrapped work on the ‘MVP’ app in early February, as to give ourselves time for app store review processes (which was fortunate as we found this was much needed!).
In general, we’re happy with the stack we’ve chosen. Iterating on features is quick, engineers can onboard with code that looks familiar to them, we can remotely push Javascript updates if we really break things.
Additionally, we’ve built an app that feels great to use. That’s not something we’ve covered in detail here, I think I’ll save that for another blog post, but I feel that any mobile technology can build great apps if you put in the effort to make it so.
There are definitely still thorny parts to React Native - tasks that seem menial like upgrading a library can turn into a multi-day battle with CI tooling, but it’s far more stable than I’d previously experienced when I tried React Native five years ago.
I hope this has provided some useful insight into what it takes to build a greenfield mobile app in 2024. We’re actively adding new features to On-call all the time, and our mobile app is going to be a huge part of that.

Rory Bain
Product Engineer
More from Behind-the-scenes building On-call

Behind the scenes: Launching On-call
We like to ship it then shout about it, all the time. Building On-call was different.
 Henry Course
July 9, 2024

Building On-call: Our observability strategy
Our customers count on us to sound the alarm when their systems go sideways—so keeping our on-call service up and running isn’t just important; it’s non-negotiable. To nail the reliability our customers need, we lean on some serious observability (or as the cool kids say, o11y) to keep things running smoothly.
 Martha Lambert
August 22, 2024

Building On-call: The complexity of phone networks
Making a phone call is easy...right? It's time to re-examine the things you thought were true about phone calls and SMS.
 Leo Sjöberg
July 16, 2024
So good, you’ll break things on purpose
Ready for modern incident management? Book a call with one of our experts today.
We’d love to talk to you about
- All-in-one incident management
- Our unmatched speed of deployment
- Why we’re loved by users and easily adopted
- How we work for the whole organization


